
When it comes to home brewing, one of the key decisions you’ll need to make is whether to use dry yeast or liquid yeast in your recipes. Each type of yeast has its own benefits and drawbacks, and understanding these differences can help you make the best decision for your brewing needs.
Dry yeast is known for being affordable, readily available, and having a longer shelf life compared to liquid yeast. It’s also more tolerant of temporary warm storage and shipping conditions, making it a popular choice for many homebrewers.
On the other hand, liquid yeast provides a wider variety of flavours and is often considered to produce better results in terms of taste and complexity. However, liquid yeast can be more expensive and requires careful storage in the refrigerator to maintain its viability.
As a home brewer, it’s important to consider factors such as cost, flavour variety, and storage conditions in order to choose the right yeast for your brewing projects. Ultimately, it’s up to you to experiment with both dry and liquid yeast to determine which one works best for your specific recipes and preferences. Happy brewing!
The Key Points:
- Dry Yeast vs Liquid Yeast: Dry yeast is affordable, readily available, and has a longer shelf life. It’s also more tolerant of temporary warm storage and shipping conditions. Liquid yeast, however, offers a wider variety of flavours and is often considered to produce better results in terms of taste and complexity, but it requires careful storage and can be more expensive.
- Strain Variety: Liquid yeast provides a wider range of strain options, allowing for more unique and complex flavours in the brew. Dry yeast, while having fewer strain options, is more robust and easier to handle.
- Brewing Frequency and Convenience: Dry yeast is suitable for infrequent brewing and is ready to pitch without a starter, making it more convenient for some brewers. Liquid yeast, while requiring a yeast starter, is suitable for regular brewing and offers more control over the final product’s flavour profile.
- Storage and Viability: Dry yeast has a longer shelf life and is more tolerant to warm storage or shipping conditions. Liquid yeast requires refrigeration and careful handling to maintain its viability.
- Experimentation is Key: The choice between dry and liquid yeast depends on various factors such as cost, flavour variety, and storage conditions. Home brewers are encouraged to experiment with both types of yeast to find what works best for their specific recipes and preferences.
Dry Yeast and Liquid Yeast: An Overview
| Aspect | Dry Yeast | Liquid Yeast |
|---|---|---|
| Cost | Generally cheaper | More expensive |
| Shelf Life | Longer shelf life (up to 3 years) | Shorter shelf life |
| Storage | Refrigeration is recommended, but tolerant of warmer temperatures for 2-3 weeks. | Requires refrigeration |
| Viability | Generally stable | May require a yeast starter for healthy fermentation |
| Strain Variety | Limited options | Wide range of strains available |
| Flavour Profile | Less complexity and depth | More complexity and depth |
| Brewing Frequency | Suitable for infrequent brewing | Suitable for regular brewing |
| Convenience | Ready to pitch without a starter | May require a yeast starter before pitching |
| Temperature Range | Tolerates broader temperature range | More specific temperature requirements |
| Handling | Easy to handle and transport | Requires careful handling and refrigeration |
-
Product on sale
 SafAle S-04 Ale YeastPrice range: $0.48 through $135.00
 -
 Lallemand Nottingham – High Performance Ale YeastPrice range: $5.70 through $219.00
 -
 Fermentis Safale US-05 Yeast x 11.5g$5.15
When it comes to home brewing, you might have come across the decision between using dry yeast or liquid yeast. Each type of yeast has its own benefits, and understanding their differences can help you choose the best option for your brew.
Dry yeast has a longer shelf life, up to 3 years, and is more tolerant to warm storage or shipping conditions. This makes it a convenient choice for home brewers, especially if you don’t brew very often. Dry yeast is usually more affordable and comes in a wide range of strains. Additionally, dry yeast is packaged with nutrient reserves, making it ready to pitch without needing a yeast starter.
On the other hand, liquid yeast has long been considered a superior product in terms of producing better aromas and flavours in the final brew. Due to the higher cell counts in most liquid yeast packets, they are suitable for starting a batch with a gravity of up to 1.065. You may also find a broader selection of strains when opting for liquid yeast.
However, liquid yeast does have a shorter shelf life than dry yeast, and it’s more sensitive to temperature fluctuations during storage or transport. It’s essential to store liquid yeast in a refrigerator and use it quickly upon purchase to ensure quality results. For higher gravity batches, you may need to create a yeast starter to ensure a healthy fermentation.
Both dry and liquid yeast have their advantages and are suitable for different brewing applications. Your choice will mainly depend on your brewing frequency, desired flavours, and storage conditions. Ultimately, experimenting with both types of yeast can help you discover which one works best for your specific brewing style and preferences.
Dry Yeast

Advantages of Dry Yeast
When it comes to homebrewing, there are many factors to consider when choosing between dry and liquid yeast. In this section, we’ll discuss the advantages of using dry yeast for your homebrew projects.
Cost and Availability
One of the main benefits of using dry yeast is that it is generally much cheaper than liquid yeast. This makes it an attractive option for homebrewers looking to save on costs.
Brands like Lallemand, Safale, and Mangrove Jacks offer a wide range of dry yeast options, making them readily available for any homebrewer.
Shelf Life
Dry yeast has a significantly longer shelf life than liquid yeast, often lasting up to three years when stored properly.
This means that you can stock up on your favourite yeast strains and have them ready to use whenever you decide to start a new homebrew project.
Homebrewers who don’t brew regularly or want to plan ahead for future brews will find this characteristic of dry yeast quite beneficial.
Storage and Transportation
Another advantage of dry yeast is its ease of storage and transportation. Unlike liquid yeast, dry yeast doesn’t require constant refrigeration, which makes it more convenient to store in your pantry or cupboard.
This lack of refrigeration also means that dry yeast can be easily transported wherever your brewing adventures take you, without the worry of maintaining a cold chain during shipping or transit.
Ease of Use
Finally, many homebrewers find dry yeast to be easier to use than liquid yeast. Most dry yeast brands are ready to pitch straight into your wort without the need for additional steps like creating a yeast starter.
This can save you time and effort in the brewing process, allowing you to focus on other aspects of crafting your perfect homebrew.
It should be noted that some brands give you instructions on rehydrating your yeast, but numerous tests and experiments have shown there to be very little if any difference in the outcome.
Disadvantages of Dry Yeast
Limited Strain Options
When it comes to home brewing, one disadvantage of dry yeast is the limited strain options available to you. While liquid yeast offers a wider variety of yeast strains, dry yeast usually only includes a few common strains like Saccharomyces cerevisiae.
Many popular manufacturers, such as Lallemand and Fermentis, produce well-known dry yeast strains like Nottingham Ale Yeast and Safale US-05. However, these strains might not cater to every homebrewer’s specific needs or produce the desired flavours.
As a homebrewer, it’s essential to experiment and find the perfect yeast strain for your brew. Since dry yeast has fewer available options, you might find it challenging to achieve that unique taste or style you’re looking for in your final product.
Yeast Viability
Another concern for homebrewers using dry yeast is yeast viability. While dry yeast generally has a higher cell count compared to liquid yeast, its long-term viability might not be as stable. Yeast viability is crucial for fermentation, as it ensures your yeast is healthy and can convert sugars into alcohol effectively.
When storing dry yeast, ensure it’s kept in a cool, dry place, as fluctuations in temperature or humidity can negatively impact the yeast’s viability. It’s also important to check the expiration date on your dry yeast packets before use. Expired yeast may not perform as well during fermentation, which could affect your homebrew’s overall quality.
Liquid Yeast
Advantages of Liquid Yeast
Strain Variety
One of the main advantages of using liquid yeast in your homebrew is the incredible variety of strains available.
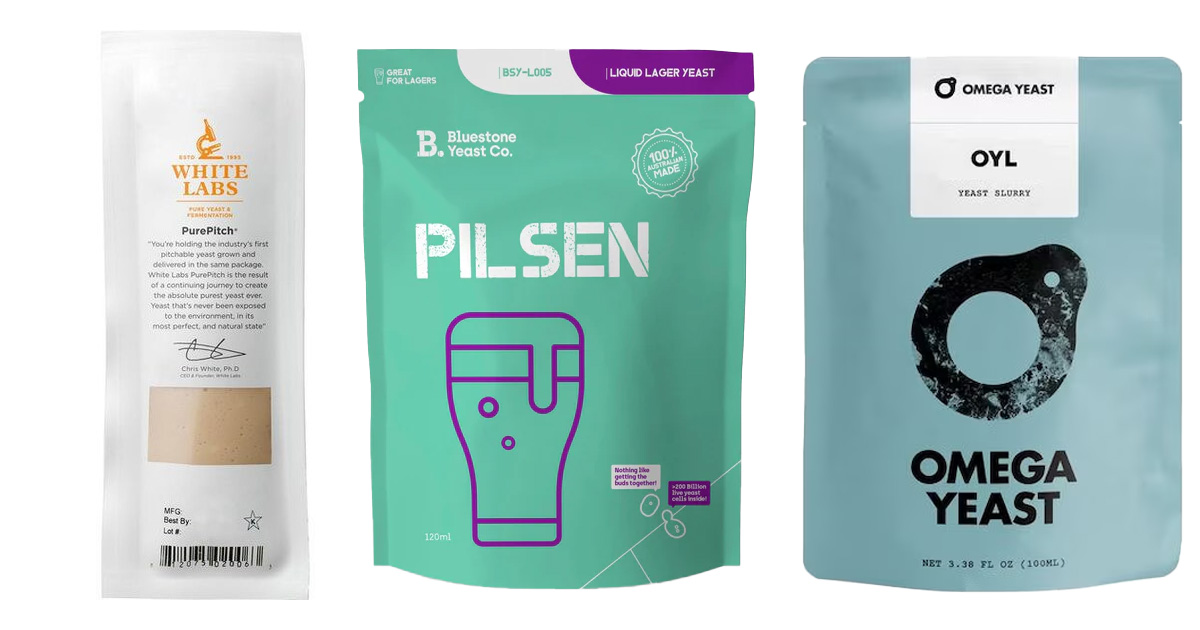
Companies like White Labs, Wyeast, Imperial Yeast, and Omega Yeast offer an extensive range of yeast strains, allowing you to produce a wide array of beer styles.
With options like saison, lager yeast, and German hefeweizen, you can experiment and create unique flavours for your brews.
Flavour Profiles
Another reason to choose liquid yeast is the distinct flavour profiles it can contribute to your beer. These yeast strains often provide more complexity and depth in flavour compared to their dry counterparts.
Liquid yeast allows you to produce beers that closely resemble specific styles such as sour beer and New England IPA (NEIPA). The presence of different strains helps you craft a perfect brew that suits your taste buds and elevates your homebrew’s overall quality.
Specialty Yeast Strains
For homebrewers looking to venture into the realm of specialty and unique beer styles, liquid yeast is an excellent choice.
Liquid yeast gives you access to strains like Brettanomyces (Brett), which allows you to produce sour and funky beers. These strains can be hard to find in dry form and can be the key to creating a standout homebrew.
Furthermore, many manufacturers offer blends of yeast strains to achieve particular results that can be tailored to specific beer styles.
Disadvantages of Liquid Yeast
Price
One main drawback of using liquid yeast in your homebrew is the cost. Liquid yeast tends to be more expensive than dry yeast. When you’re trying to create a cost-effective homebrew, it’s important to consider the price, especially if you’re brewing larger quantities.
Shorter Shelf Life
Liquid yeast has a shorter shelf life compared to dry yeast. It requires refrigeration to maintain its quality and viability. For homebrewers, this might lead to additional planning and effort to ensure that your yeast is still suitable for brewing when you need it.
Handling and Storage
Proper handling and storage of liquid yeast is essential for successful brewing projects. You’ll need to keep it refrigerated until you’re ready to use it, which can take up valuable space in your fridge.
You may also need to make a yeast starter before pitching it into your wort, which requires more equipment, planning and time.
Additionally, liquid yeast can be more susceptible to contamination if not handled and stored carefully. This requires extra attention on your part when brewing at home.
Shipping and Transportation
Lastly, shipping and transporting liquid yeast can be more complicated than dry yeast. Popular liquid yeast brands, such as Wyeast and White Labs, require refrigerated shipping to ensure that the yeast remains viable. This can lead to higher shipping costs and potential delays in receiving your yeast, which might impact your home brewing schedule.
Preparing Yeast for Home Brewing
In this section, we’ll explore the processes of rehydrating dry yeast and creating a yeast starter for liquid yeast.
Rehydrating Dry Yeast
For homebrewers using dry yeast, it’s sometimes suggested to rehydrate your yeast before adding it to your brew.
Theoretically, rehydrating dry yeast helps ensure that the yeast cells wake up and become active, contributing to a healthy fermentation process.
To rehydrate your dry yeast, follow these simple steps:
- Boil a small amount of water, approximately 100-200ml depending on the yeast manufacturer’s instructions, and allow it to cool to a temperature between 35-40°C (95-104°F).
- Sprinkle the dry yeast on top of the water without stirring. Allow the yeast to absorb the water for about 15 minutes.
- Gently stir the yeast and water mixture to help dissolve any clumps and ensure all the yeast is hydrated.
- If needed, let the mixture cool to the same temperature as your wort before pitching to prevent temperature shock that may harm the yeast.
Following these steps will give your dry yeast a better chance of producing a successful fermentation and a great-tasting homebrew.
Creating a Yeast Starter for Liquid Yeast
For homebrewers using liquid yeast, creating a yeast starter is a valuable step to ensure that you’re pitching enough healthy yeast cells into your wort. A yeast starter helps increase the number of yeast cells and ensures they’re active and ready to ferment your brew.
Here’s a simple guide to create a yeast starter for your liquid yeast:
- First, prepare a small wort by boiling 100g of dry malt extract (DME) for every 1L of water. A common size for a yeast starter is 1L, using 100g of DME.
- Boil the wort for about 10 minutes to sterilise it and then cool it down to room temperature, around 20-25°C (68-77°F).
- Pour the cooled wort into a sterilised, sealable container, such as an Erlenmeyer flask or a large mason jar.
- Add your liquid yeast to the wort, ensuring that you’ve properly sanitised the package before opening.
- Seal the container and gently shake or swirl to aerate the wort, promoting the growth of your yeast cells. You can also use a magnetic stirrer to improve results.
- Allow the yeast starter to ferment for 24-48 hours before pitching it into your main wort.
By following these instructions, your liquid yeast starter will contribute to a healthy fermentation process and ultimately lead to exceptional homebrew results.
-
 Lallemand New England American East Coast Ale Yeast x 11g$5.70
 -
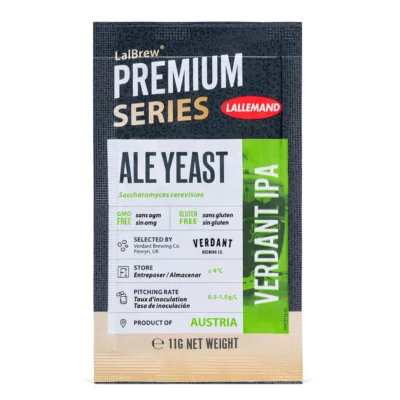 Lallemand Verdant IPA Ale YeastPrice range: $6.20 through $248.00
 -
 Lallemand Voss Kveik YeastPrice range: $5.95 through $250.00
Factors to Consider when Choosing Yeast
When choosing between dry and liquid yeast for your home brewing, it’s essential to consider several factors like brewing recipe, beer style and flavour profile, and fermentation temperature.
In this section, we’ll discuss how these factors affect your yeast selection.
Brewing Recipe
Your brewing recipe can significantly influence your choice of yeast. Some recipes specifically call for either dry or liquid yeast, while others leave it up to your preference.
Dry yeast is more affordable and has a longer shelf life, making it a convenient option for homebrewers.
In contrast, liquid yeast offers more strain variety to achieve a specific flavour profile. Make sure to follow your recipe’s guidelines or consult with experienced homebrewers if you’re unsure which type to use.
Beer Style and Flavour Profile
Different beer styles and flavour profiles benefit from using specific yeast strains. Liquid yeast strains offer a wider range of options, making it easier to find the perfect match for your beer style, whether you’re brewing a saison, sour beer, or a NEIPA.
Some dry yeast varieties, like US-05, are versatile and can be used across various beer styles, but generally, liquid yeast allows for more precise control over the final product’s flavour.
If you’re aiming for a commercial-style or clone of a particular beer, using a specific liquid yeast strain could be the key to achieving that goal.
Fermentation Temperature
Fermentation temperature plays an essential role in producing quality homebrew, and choosing the right yeast for your temperature range can make a significant difference. Dry yeast typically tolerates a broader temperature range and is known for being robust and resilient. So, if you’re unable to strictly control your fermentation temperature, dry yeast may be the better choice for your homebrewing needs.
On the other hand, liquid yeast strains often have a more specific temperature range they perform best at. This can be a good thing for precise control over your beer’s flavour profile, but it may be more challenging for homebrewers without advanced temperature control equipment. Always check the recommended temperature range for the yeast you’re considering and ensure it will work well within your brewing setup.
Maintaining Yeast Health and Quality
Oxygenation
Proper oxygenation is crucial for both dry and liquid yeast when it comes to home brewing. Yeast cells require oxygen to grow and reproduce effectively during the fermentation process. For dry yeast, the need for wort oxygenation may be reduced or eliminated due to the nutrients already present in the package.
However, it’s still a good practice to oxygenate your wort before pitching either type of yeast, as it helps promote healthy yeast growth and faster fermentation.
Nutrients
Providing adequate nutrients is essential to ensure optimal fermentation. While dry yeast sometimes comes with nutrients in the package, making it ready to pitch, liquid yeast often requires additional nutrients.
I recommend that no matter what yeast type you plan to use, homebrewers add yeast nutrient to the wort, which is a blend of essential minerals and compounds that support yeast growth and activity.
This will help yeast reach its full attenuation potential and improve the overall quality of your homebrew.
Proper Fermentation Conditions
To maintain yeast health and achieve the best fermentation results, it’s important to create proper fermentation conditions for both dry and liquid yeast.
One of the most important things to control during fermentation is temperature.
Maintain a consistent temperature within the yeast’s preferred range. Temperature variations can cause yeast stress, leading to off flavours and poor attenuation.
The Recap
In the world of home brewing, choosing between dry yeast and liquid yeast can have a significant impact on your final product. Both types of yeast have their own set of advantages and disadvantages, and the right choice depends on your specific brewing needs.
When it comes to dry yeast, you’ll find it’s more affordable and has a longer shelf life than liquid yeast. It’s also more temperature-tolerant, making it an ideal option for homebrewers in warmer climates or those without consistent refrigeration. With dry yeast, you can get started right away, as it comes with nutrient reserves and is ready to pitch without the need for a yeast starter.
On the other hand, liquid yeast offers a wider variety of strains, giving you more flexibility in achieving specific flavours and characteristics in your beer. However, it requires more careful handling, particularly when it comes to temperature control during storage and shipping. You’ll also need to prepare a yeast starter before pitching liquid yeast, adding a bit of complexity to the process.
As a homebrewer, consider the variables that matter most to you while brewing great beer. For instance, if you’re experimenting with unique flavours and styles, liquid yeast might be the better option due to the variety of strains available. on the contrary, if you want an easier and more cost-effective choice, dry yeast could be your go-to option.
Keep in mind that regardless of the yeast type you choose, factors such as fermentation temperature, sanitation, and managing off-flavours like esters and diacetyl will play crucial roles in producing a superb brew. By carefully selecting and handling your yeast, and maintaining attention to the brewing process, you’ll be well on your way to crafting the ultimate homebrew to delight your palate.
-
Product on saleSafAle S-04 Ale YeastPrice range: $0.48 through $135.00
-
Lallemand Nottingham – High Performance Ale YeastPrice range: $5.70 through $219.00
-
Fermentis Safale US-05 Yeast x 11.5g$5.15